Beyond the basics: Creating the OpenCode office
Intro
While OpenCode can create basic files and write code, connecting it to specialized MCP servers transforms it into a complete office assistant capable of professional document and spreadsheet creation. By integrating Excel and Word MCP servers, you can have your AI agent generate formatted spreadsheets with formulas and charts, create professional documents with styles and tables, and automate complete business workflows—all from simple natural language prompts.
In this tutorial, we'll connect two powerful MCP servers to OpenCode: an Excel server for spreadsheet manipulation and a Word server for document creation. You'll learn how to set them up and combine them for real office automation workflows. If you haven't set up OpenCode yet, check out our installation guide first.
Prerequisites
Before beginning, ensure you have:
OpenCode installed on your system
UV package runner installed (uvx command)
Access to the terminal/command line
Microsoft Excel and Word or LibreOffice installed (for file format compatibility)
This tutorial is a Linux based tutorial.
Don’t have uv Installed?
Installing uv is super quick and easy. You can either install with Pythons pip installer or using curl in your terminal.
#Installing using pip
pip install uv

#Installing using curl
curl -LsSf https://astral.sh/uv/install.sh | sh
You can learn more about uv here.
MCP Setup Feature Summary.
First, let's go over the Excel MCP server which will allow OpenCode to create and manipulate spreadsheets with formulas, formatting, and charts. This will expand the capabilities of your agent when interacting with Excel documents. You can find out more about the MCP Excel server we are using here
Common Excel MCP Operations:
Get workbook metadata
Read data from a range
Write data to cells
Create a new worksheet
Format cell range
Next, we'll go over the Word document MCP server for creating professional formatted documents. You can find out more about the MCP Word server we are using here
Common Word MCP Operations:
Add a heading
Add a paragraph
Add a page break
Add a table
Format table
Connecting MCP Servers to OpenCode
Now we need to tell OpenCode about our MCP servers by editing the configuration file. OpenCode uses a config file to connect to our MCP servers much like Claude Code and others like it. Open a terminal if you do not have one open already and navigate to the OpenCode config directory.
# Create the directory if it doesn't exist
mkdir -p ~/.config/opencode

# Navigate to the directory
cd ~/.config/opencode
Now that we have our configuration directory we can create or edit the opencode.jsonc file to configure our servers. We are going to use nano:
nano opencode.jsonc
Now add the following configuration to connect both servers to OpenCode:
{
  "$schema": "https://opencode.ai/config.json",
  "mcp": {
    "excel": {
      "type": "local",
      "command": ["uvx", "excel-mcp-server", "stdio"],
      "enabled": true
    },
    "word": {
      "type": "local",
      "command": ["uvx", "--from", "office-word-mcp-server", "word_mcp_server"],
      "enabled": true
    }
  }
}
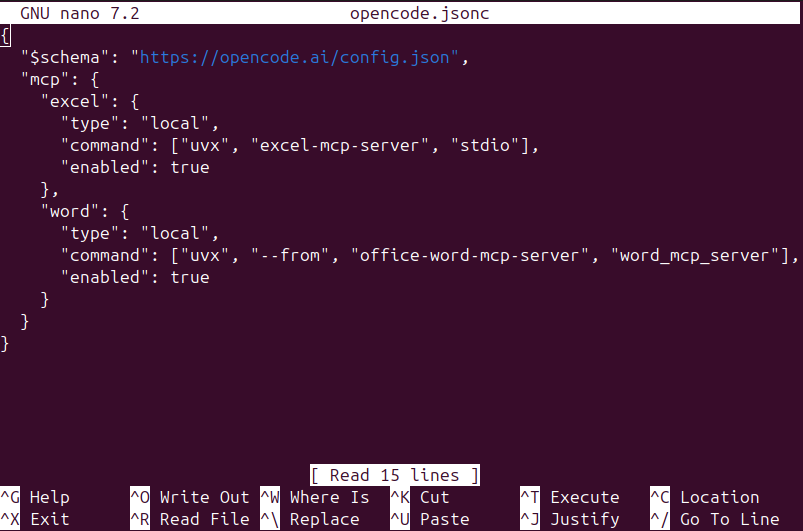
opencode.jsonc in nano viewer
Make sure to save these changes and were done setting up! Next its time to actually test our configuration. We should see 2 connected MCP servers the next time we use OpenCode in a fresh terminal session.
Testing Our Configuration
Open a new terminal and type “opencode“ this will start the application and you will see 2 MCP servers on the bottom left of the OpenCode terminal. This means we are connected and OpenCode can get to work in our office!
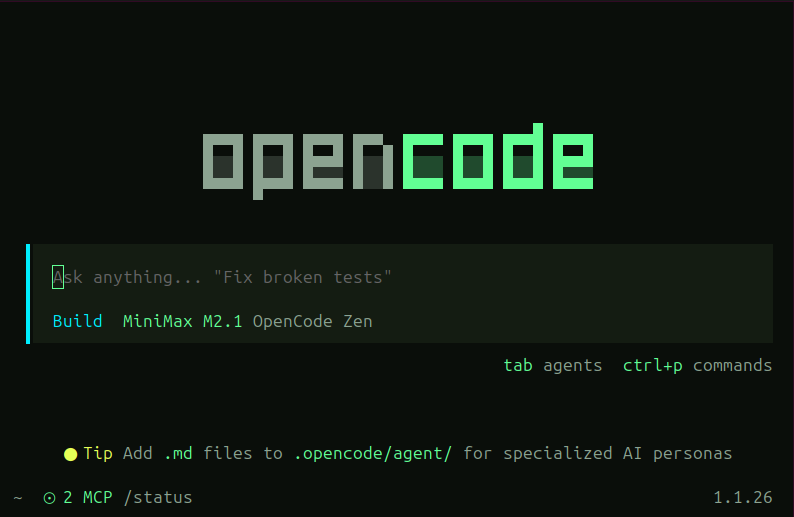
OpenCode Terminal
Now lets get an excel file to use. OpenCode can already create basic excel files on its own without the Excel MCP server so we will download a bigger, more complex one. You can go to https://www.exceldemy.com/learn-excel/sample-data and download existing sample excel documents.
This tutorial is using an excel document from the site called “Project-Management-Sample-Data.xlsx“ but you can use what you want. This excel file has been downloaded to the desktop.
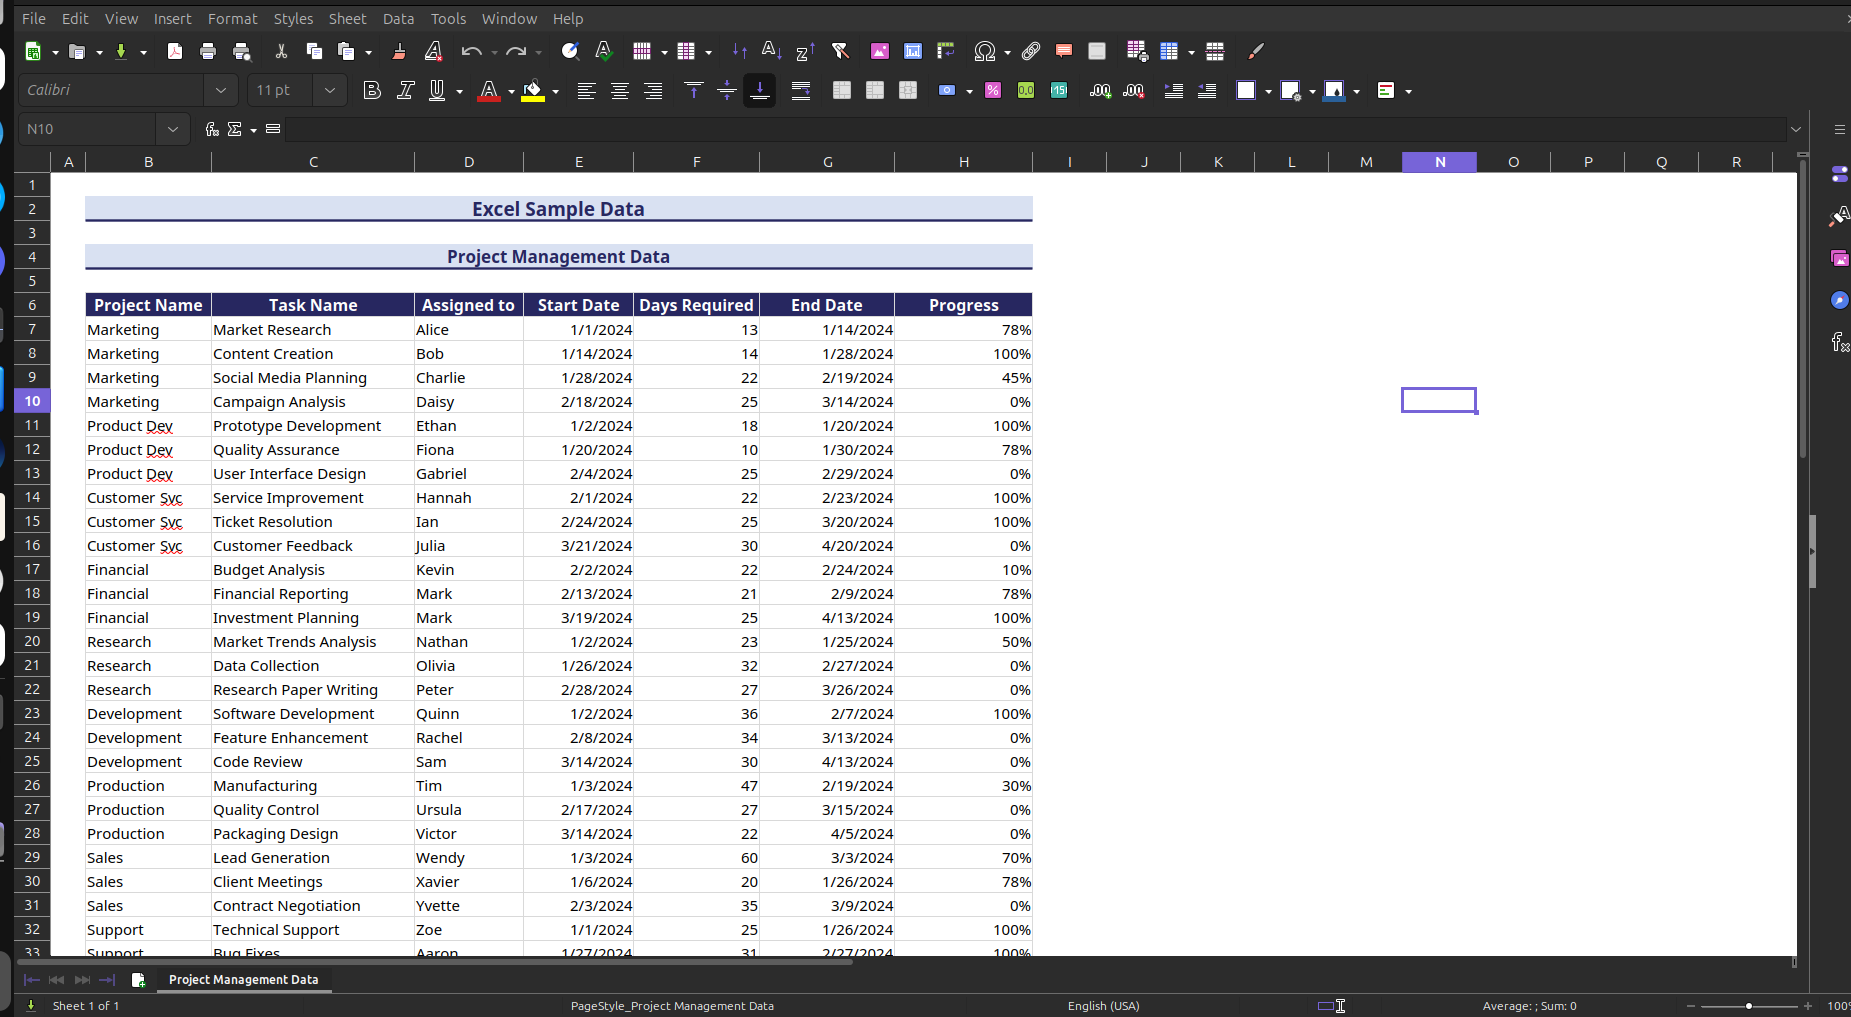
Project-Management-Sample-Data.xlsx spreadsheet
Now we are going to go back to OpenCode and use the following prompt if you have this same excel file or use whatever prompt you want.
Prompt:
Analyze ProjectManagementSampleData.xlsx and create:

1. EXCEL - Add three new sheets:
   - "Project Status": Summary of all projects with status indicators (Green/Yellow/Red)
   - "Timeline View": Gantt-style visualization showing project schedules
   - "Resource Analysis": Who's working on what, workload distribution

2. WORD - Create "PM_Executive_Report.docx":
   - Project Portfolio Overview
   - Top 3 at-risk projects with details
   - Resource constraints and recommendations
   - Next quarter priorities

Pull actual data from the spreadsheet and format everything professionally.
Our agent will now get to work. The agent first looks for the Excel file and uses the Excel MCP server tools to read the data understanding the sheet and then completing the tasks we laid out for it. You should see the agent actually using our MCP server tools.
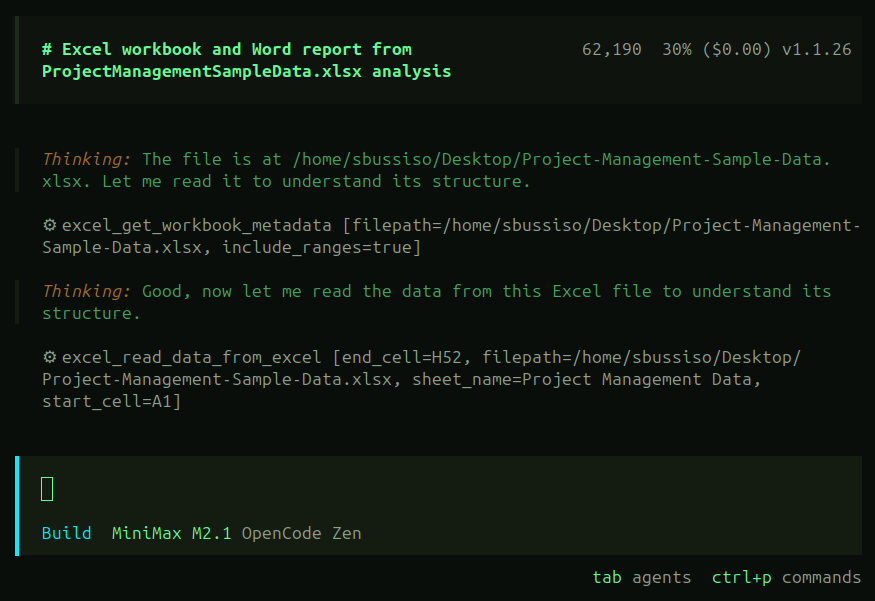
OpenCode agent MCP usage
The agent understands it needs to create 3 new Excel sheets and a Word document. It starts by creating and populating the 3 sheets in our excel file “Project-Management-Sample-Data.xlsx“.
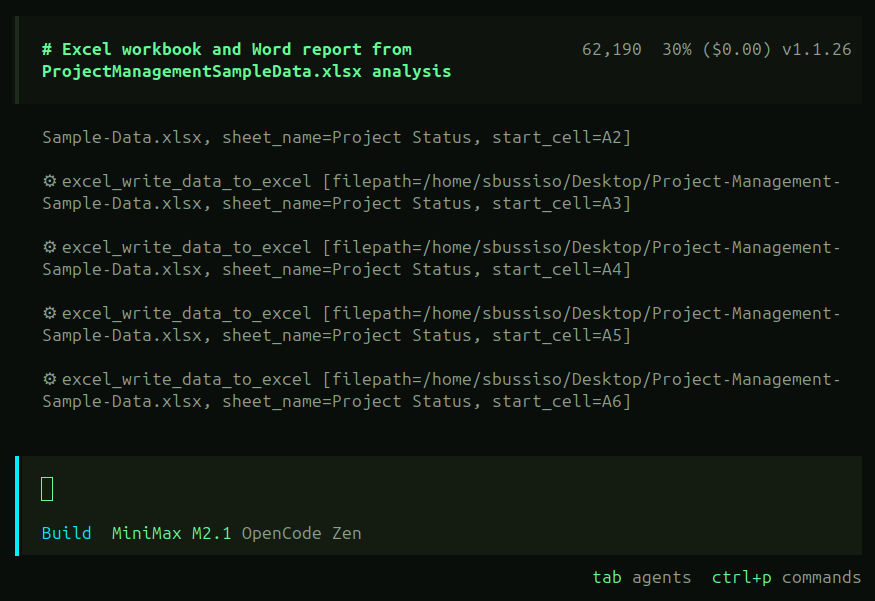
OpenCode agent MCP usage
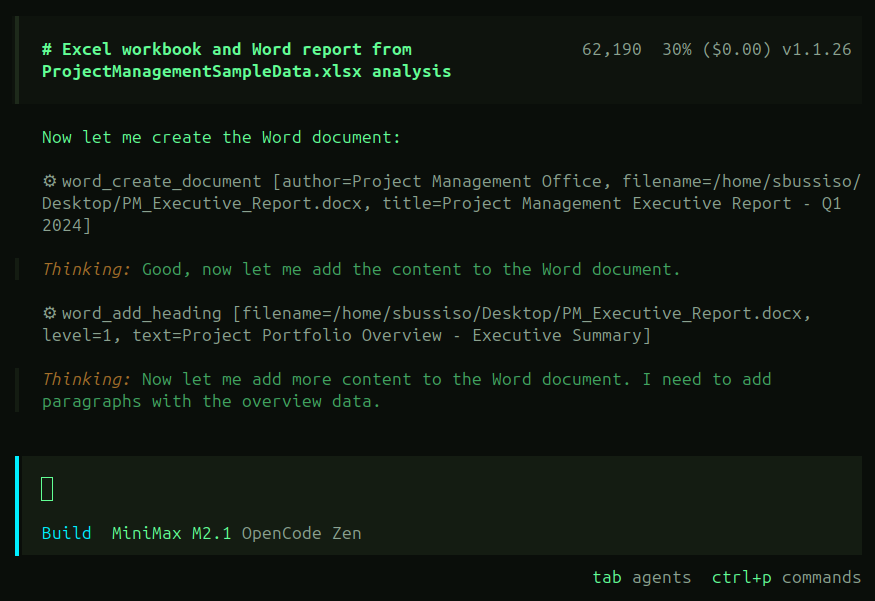
The agent then begins to format the Excel sheets and create the Word document. It uses the Excel MCP server tools to decorate and format first and then begins to use the Word document MCP server to Create the executive report we prompted it to create based off our our Excel data.
OpenCode agent MCP usage.
Once the agent has completed its tasks we should now have 2 different files. The first being our original (now altered) excel file “Project-Management-Sample-Data.xlsx“ and the second file being the new agent created “PM_Executive_Report.docx“ which is our executive report word document we prompted the agent to create.
First lets check the Excel sheet so we can see if the agent completed its task of creating the new sheets successfully. Lets look at the new Project Status tab which shows a summary of all projects with status indicators as instructed.
There is a minor issue here where in the “Status“ column where its saying color in text rather than actual color. This could be avoided with better prompting and also fixed manually or with prompting.
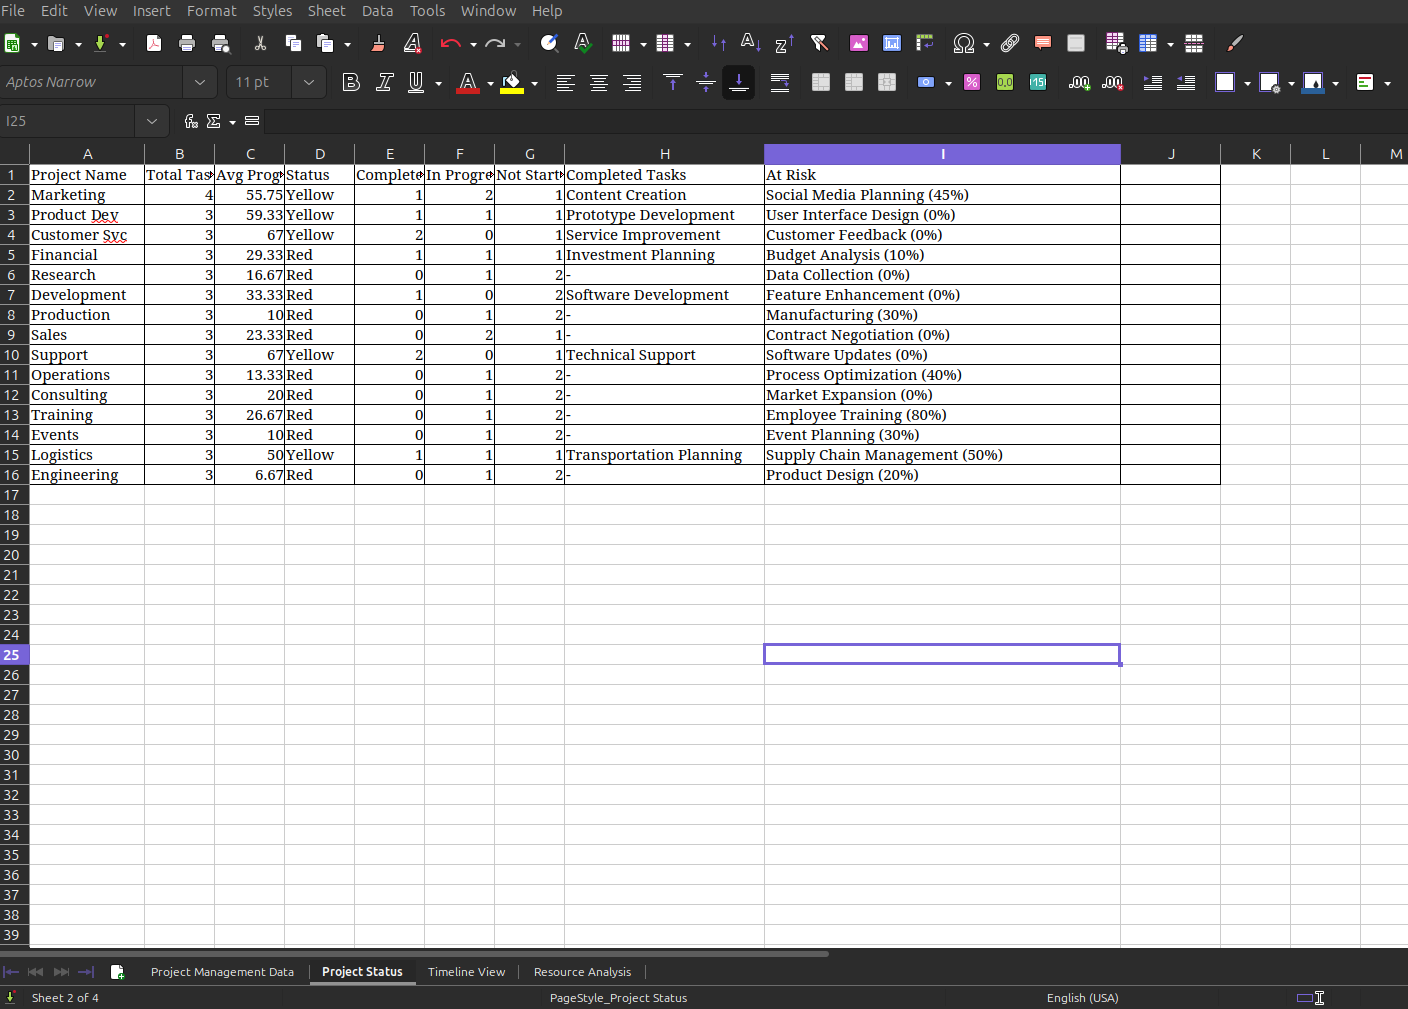
Project-Management-Sample-Data.xlsx “Project Status“ tab
Now lets take a look at the “Timeline View“ sheet. It looks like the agent successfully created the Gantt-style visualization showing project schedules like we prompted it to do so.
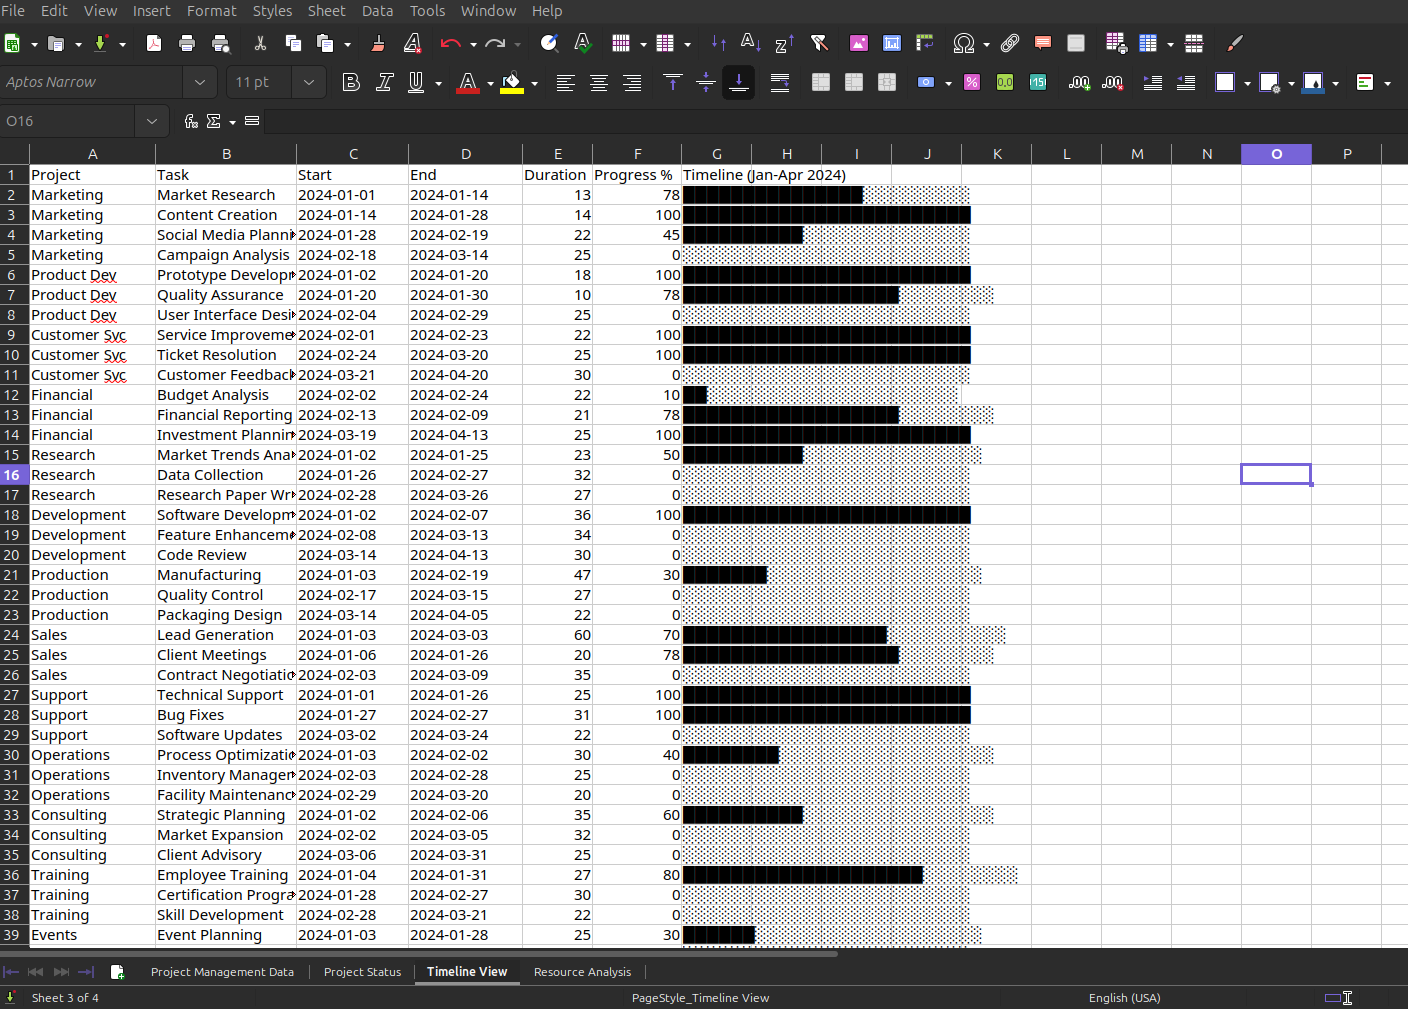
Project-Management-Sample-Data.xlsx “Timeline View“ tab
Now to check the final new sheet we asked the agent to create. In our prompt we asked it to create a “Resource Analysis“ sheet showing who’s working on what and the workload they are taking on. It looks like the agent completed this successfully using the Excel MCP tools.
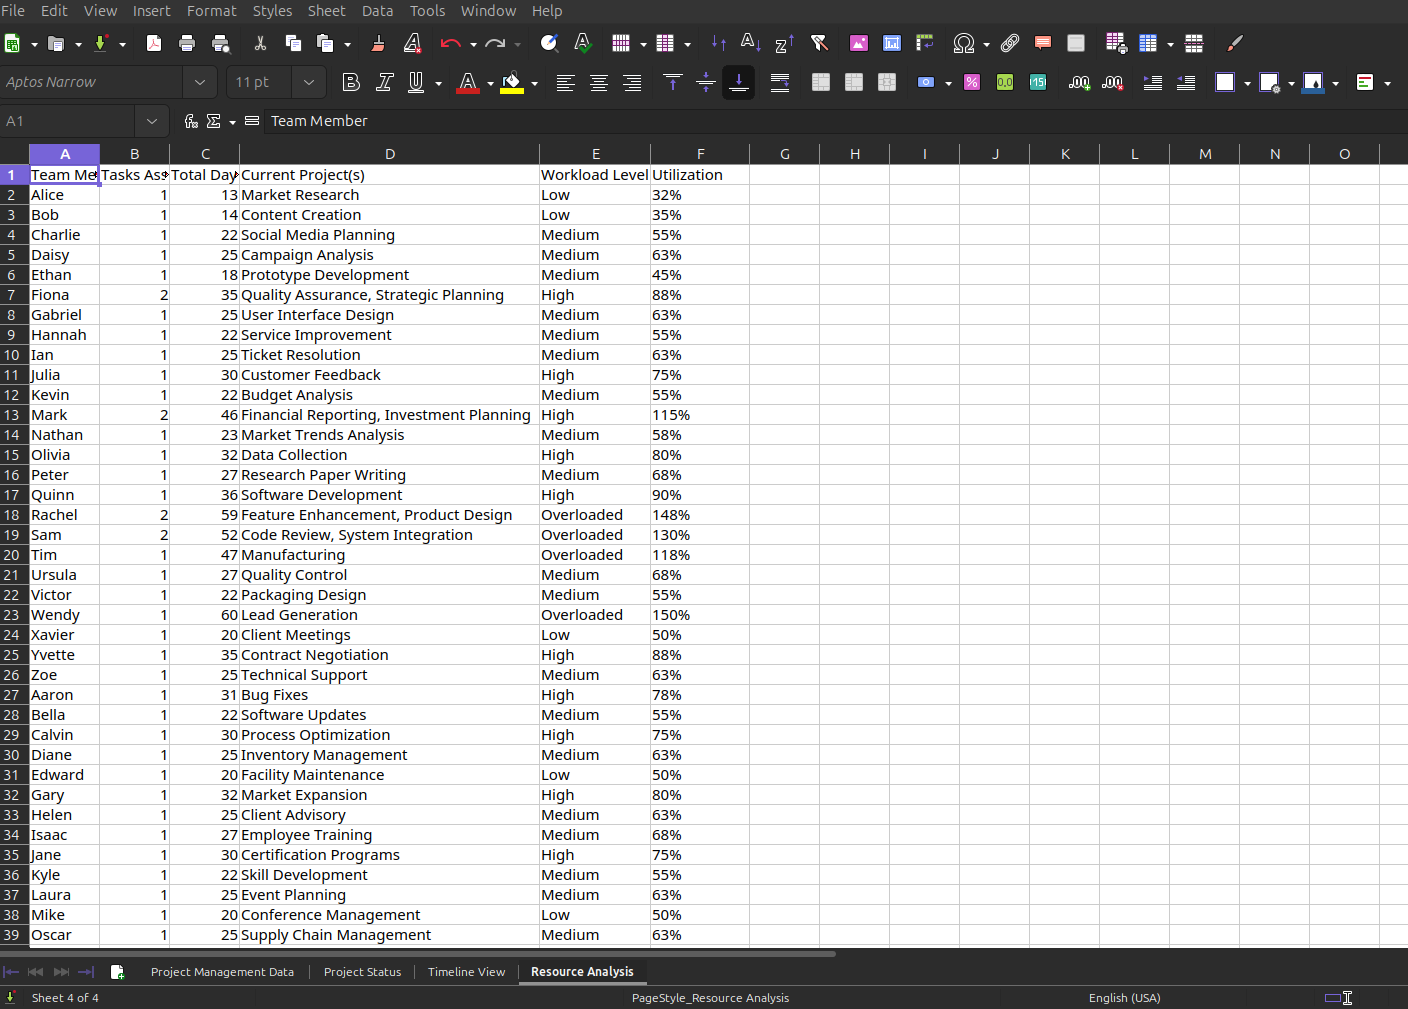
Project-Management-Sample-Data.xlsx “Resource Analysis“ tab
We verified all 3 pages were created successfully as we prompted so now its time to check the Word document we asked it to create in our prompt as well. This is the executive report called “PM_Executive_Report.docx“.
We should now see a full detailed executive report based on our Excel data.
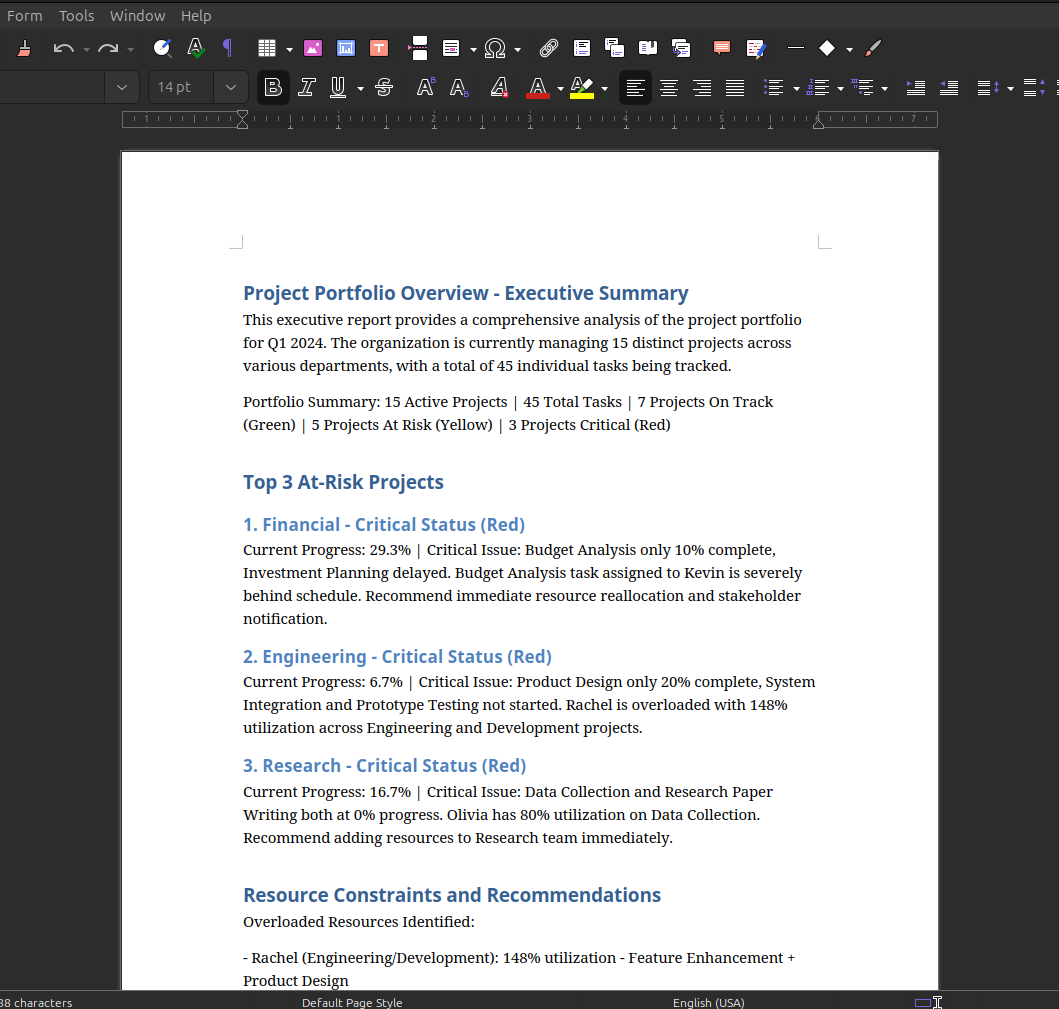
PM_Executive_Report.docx
Depending on what agent model you are using you may or may not experience some errors. You can fix these manually, prompt the agent to fix them, try different models or better, more descriptive prompts.
Conclusion
By connecting Excel and Word MCP servers to OpenCode, you move far beyond simple code generation and into true office automation. What we’ve built in this tutorial is a practical example of how an AI agent can understand real business data, manipulate complex spreadsheets, apply professional formatting, and then synthesize that information into a polished executive report—all from a single natural language prompt.
While the results may not always be perfect on the first pass, that’s part of the workflow. Better prompts, iterative refinement, and occasional manual touch-ups can quickly close the gap. The key takeaway is that OpenCode, when paired with MCP servers, becomes a collaborative digital office worker: one that can analyze data, create structured documents, and dramatically reduce the time spent on repetitive reporting tasks.
From project management reports to financial summaries, operational dashboards, and beyond, this approach opens the door to automating entire document related workflows. This was just one tutorial using 2 servers, there are many more out there and probably some better than this so don’t forget to see what else is out there!