Beyond The Basics: Using OpenCode to create and use an MCP server.
OpenCode Terminal
By S’Bussiso Dube/SourceBox Team
Updated June 6, 2026
Intro
Model Context Protocol (MCP) servers extend AI agents with custom tools and capabilities from accessing databases to performing calculations to integrating with external APIs. Instead of being limited to what the AI can do out of the box, MCP lets you build specialized tools that your coding agent can call on demand. The fascinating part? You can use AI to create these tools for itself.
In this tutorial, we're going to use OpenCode to build a custom MCP server using Python's FastMCP framework, test it with the official MCP Inspector, and then connect it back to OpenCode creating a complete feedback loop where the AI agent can use the very tools it just created.
We'll build a simple calculator server as our example, but the workflow applies to any MCP server you want to create. This tutorial assumes you're on Linux with Python 3, pip, and OpenCode already installed and configured. If you haven't set up OpenCode yet, check out our installation guide first.
Creating an MCP server with OpenCode
First we are going to create a folder for our project and start OpenCode in our folder. This tutorial is going to use a folder called “OpenCode-MCP“ on the desktop. You can do this by using the following commands or just create the folder on your desktop the normal way and launch opencode just make sure to point it to your folder.
Linux
mkdir ~/Desktop/OpenCode-MCP
cd ~/Desktop/OpenCode-MCP
opencode
Windows
mkdir "$env:USERPROFILE\Desktop\OpenCode-MCP"
cd "$env:USERPROFILE\Desktop\OpenCode-MCP"
opencode
Now OpenCode should start and in the bottom left corner we should see our project folder location “~Desktop/OpenCode-MCP“ for Linux and “C:\Users\Sbuss\Desktop\OpenCode-MCP“ for Windows. Once we verify this is correct, we can move on to creating our MCP server.

OpenCode Terminal
Time to get cooking! Now we need to think of a good prompt to use, not just any prompt will return the MCP server we want and it may not do so correctly.
We are going to use the following prompt bellow:
Create a basic calculator mcp server using pythons FastMCP framework covering addition, subtraction, multiplication, and division.
Important Note: LLM’s do not produce deterministic outputs which means even using the same exact prompt with the same exact model in this tutorial will not guarantee the same exact code output you will see. It’s a good idea to have a decent understanding on how to create a basic calculator in python and a little experience with python frameworks.
Once we input our prompt our coding agent’s going to get to work. The agent first starts to think breaking down the request. It then starts to search for related documentation and starts to come up with a plan and starts to execute.
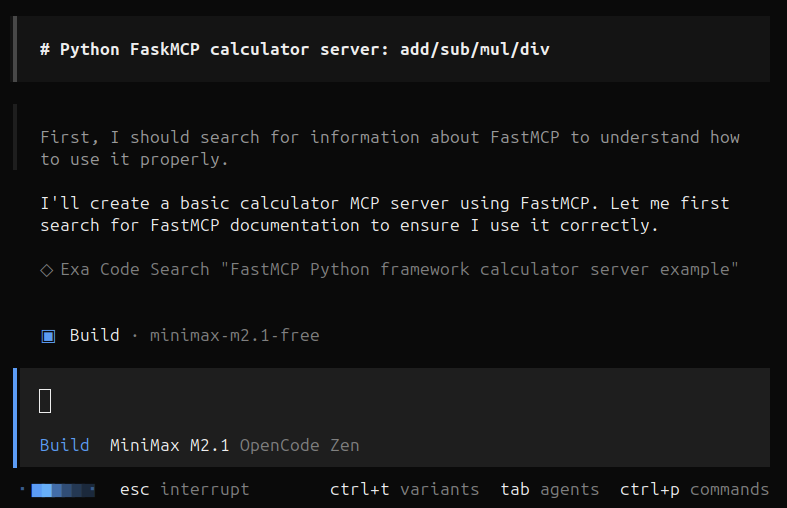
OpenCode agent thinking
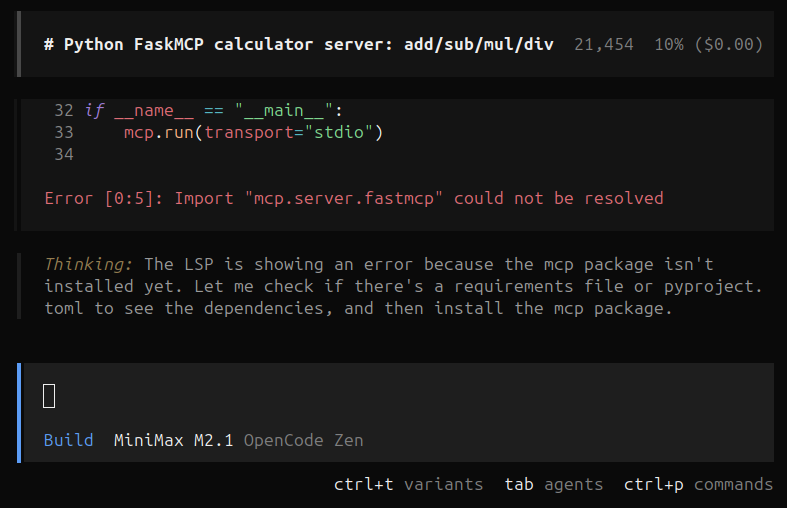
The agent writes the script but comes across an issue “Import mcp.server.fastmcp could not be resolved“. The agent automatically tries to fix this issue by setting up the environment and downloading the dependencies properly.
You can also solve this issue yourself by installing FastMCP using the pip install command:
pip3 install fastmcp
OpenCode agent building
Now the agent has fully completed the task and reported back to us. Based on our prompt it created the MCP calculator server and it looks like it understood the prompt and completed the task successfully.
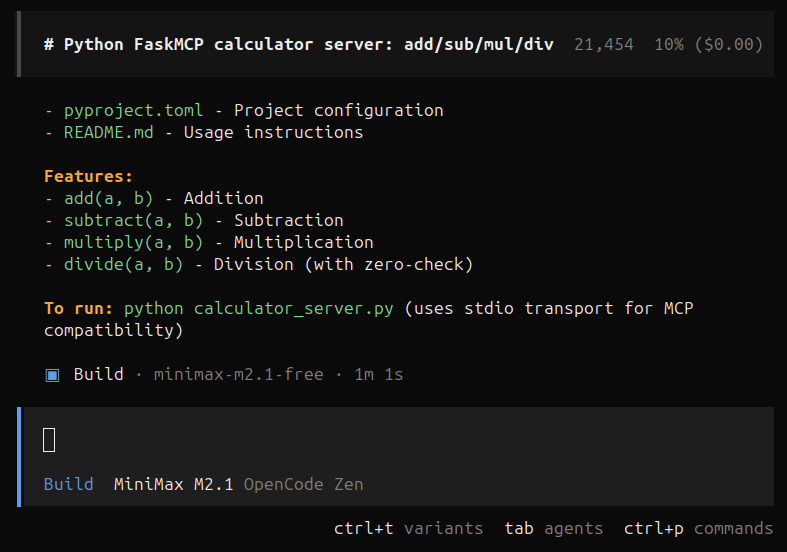
OpenCode agent response
From the output the coding agent tells us that to run this project we have to use the following command (Incorrect):
python calculator_server.py
This is why we still need some programming knowledge and to pay attention. if we open a terminal in our project folder and use this command we will get the following error:
Command 'python' not found, did you mean:
  command 'python3' from deb python3
  command 'python' from deb python-is-python3
This tutorial assumes you have basic programming/debugging skills and are somewhat comfortable or at least familiar with a terminal. Now for context this tutorial was done on Ubuntu Linux That being said our coding agent does not recognize that and gives us “python“ instead of “python3“.
Windows
If you are following along on Windows, you may not have even had this issue.
The command to run the script is the following:
python calculator_server.py
Linux
If you’re on Linux, then the real command to run for Linux is the following:
python3 calculator_server.py
Import Errors
If you are getting any import errors it’s because before we actually run the program, we need to activate the python virtual environment. Without our MCP server will not run. We can fix this by using the command:
#Linux
source venv/bin/activate

#Windows
.\venv\Scripts\Activate.ps1
Now we can run and test our MCP server. Open the terminal in your project directory if you have not already and type the following commands and press enter.
#Linux
python3 calculator_server.py

#Windows
python calculator_server.py
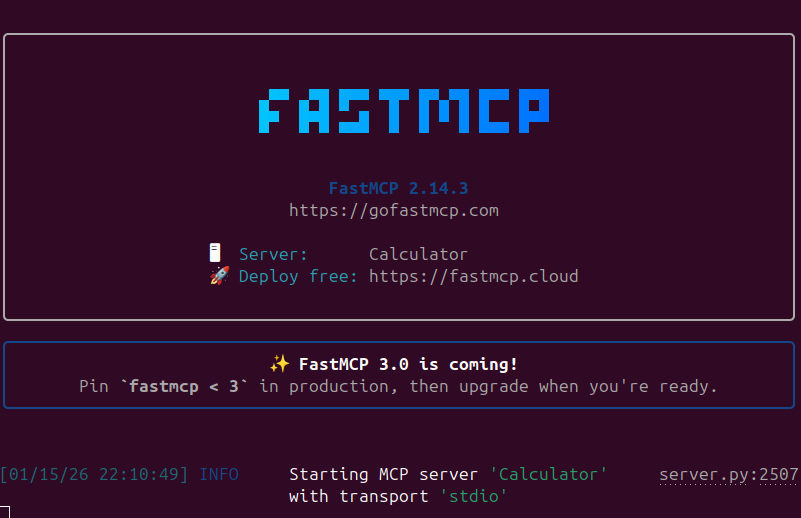
FastMCP server running
Now its time for us to actually test our MCP server before we connect it to OpenCode giving our agent access to it. After all we don’t want to give our agent a broken toolkit. To do this we are going to use the official MCP inspector tool.
Open a new project terminal and activate the virtual environment. Now we are going to type the following commands:
# start Inspector
fastmcp dev calculator_server.py
We should now see it spin up the MCP Inspector in the terminal. This will launch a browser window in your default browser.
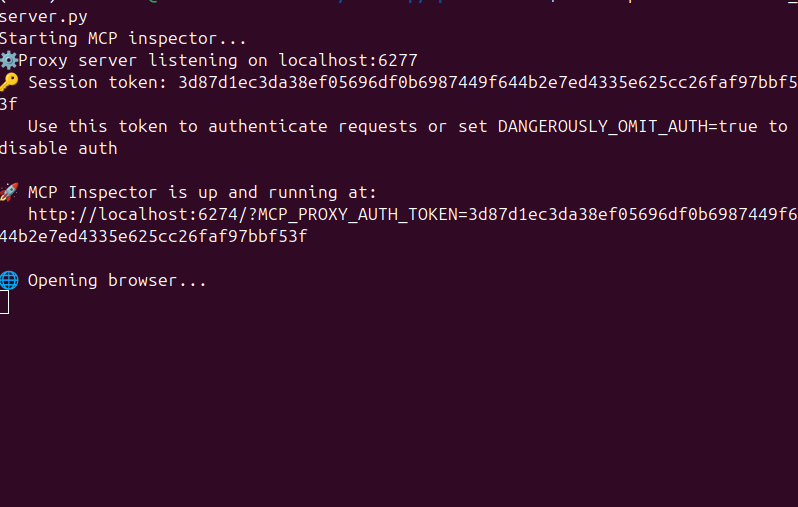
Launching MCP Inspector
We can now go to our browser and open the MCP Inspector if we have not done so already and press the connect button around the bottom left of the page.
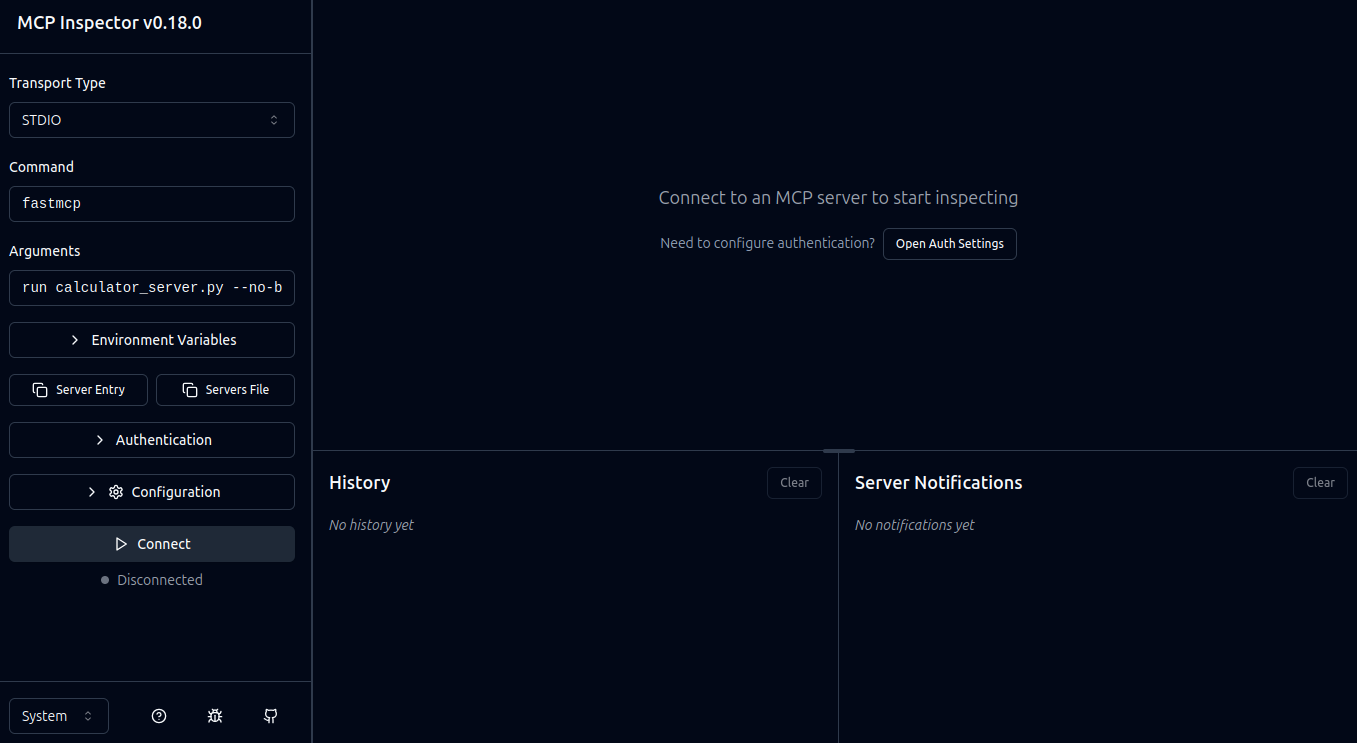
MCP Inspector
If our connection was successful we should see the Inspector UI update with our MCP information with tools and resources such as history, server notifications, etc. We can test requests and debug our MCP server all here in this nice web UI.
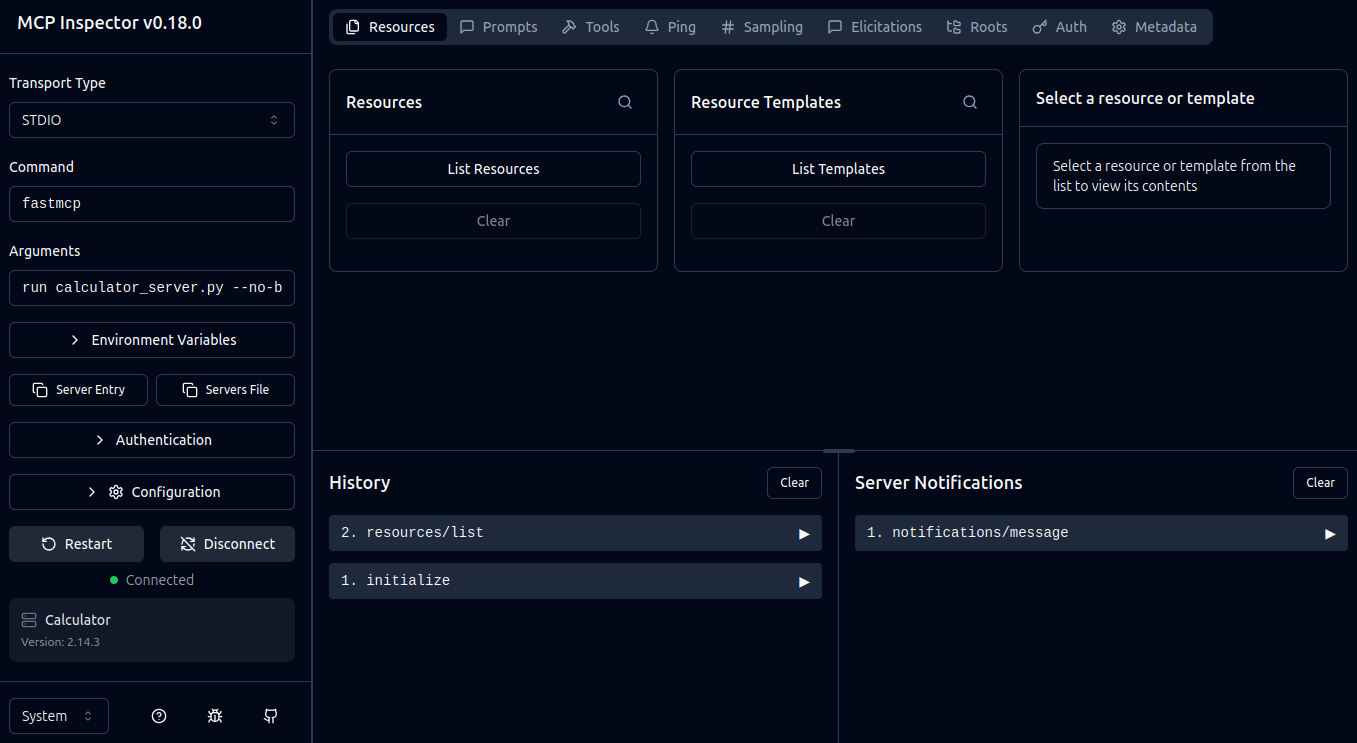
MCP Inspector Connected
We did it! We successfully built our own custom MCP server using OpenCode and FastMCP. Next we are going to connect the MCP server to OpenCode giving our agent access to the server and its tools.
Connecting Our MCP Server to OpenCode.
In order to connect our MCP server to OpenCode for the coding agent to use we need to first open our OpenCode configuration and create (if you do not have already) a file called “opencode.jsonc“. This is the configuration OpenCode looks for to get and use our MCP server.
We are going to open our terminal or PowerShell and type the following command:
#Linux
cd ~/.config/opencode

#Windows
New-Item -Path "$env:USERPROFILE\.config\opencode" -ItemType Directory
Now this should open the OpenCode configuration folder. Now we need to create the actual configuration file. There are multiple ways you can do this: nano, notepad, text editor, etc. I will be showing nano and Windows Notepad since it is already installed on many Linux/Windows systems.
Linux
nano opencode.jsonc
Now we will input the actuall schema setup for our MCP server we created.
{
  "$schema": "https://opencode.ai/config.json",
  "mcp": {
    "calculator": {
      "type": "local",
      "command": ["virtual-environment-path", "main-code-file-path"],
      "enabled": true
    }
  }
}
Replace "virtual-environment-path" with the full path to your virtual environment's Python binary (e.g., /home/username/Desktop/OpenCode-MCP/venv/bin/python) and "main-code-file-path" with the full path to your calculator_server.py file (e.g., /home/username/Desktop/OpenCode-MCP/calculator_server.py).
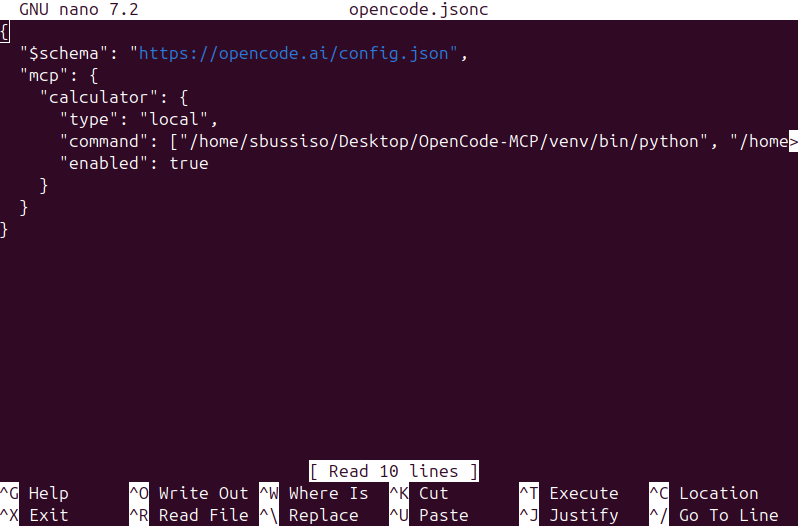
opencode.jsonc file creation via nano
Windows
notepad "$env:USERPROFILE\.config\opencode\opencode.json"

Empty Windows notepad
Now we will input the actual schema setup for our MCP server we created.
{
  "$schema": "https://opencode.ai/config.json",
  "mcp": {
    "calculator": {
      "type": "local",
      "command": ["virtual-environment-path", "main-code-file-path"],
      "enabled": true
    }
  }
}
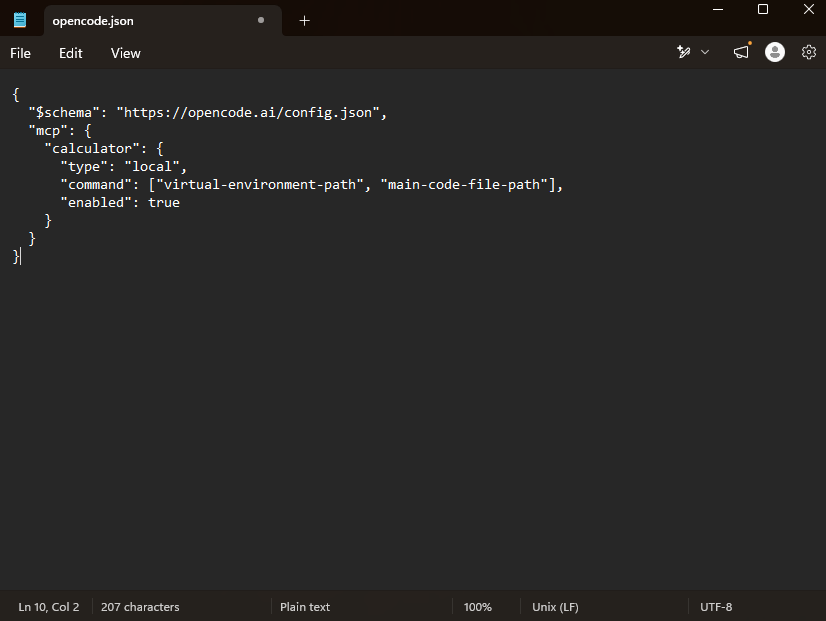
Windows Notepad with schema applied
Replace "virtual-environment-path" with the full path to your virtual environment's Python binary and the main code’s file path to your calculator_server.py file (e.g., C:\Users\Username\Desktop\OpenCode-MCP\calculator_server.py).
If done correctly we are going to close and restart OpenCode and now we should see an MCP status section appear in the bottom left.
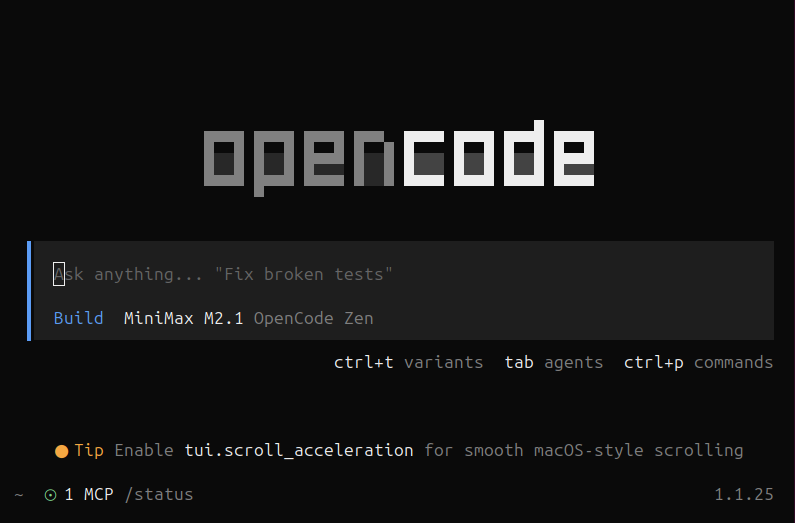
OpenCode Terminal with MCP Connection
Now its time to play around and test it out! Enter any calculator related prompt you want or enter the following prompt:
what is one thousand divided by seven?
We should now see our coding agent actually accessing and using our MCP server to give us an answer! The agent thinks about our prompt and decides to use “calculator_divide“ which is a tool in our server. It then actually uses the tool dividing 1000 by 7.
The agent then processes the output of the tool and responds back to us!
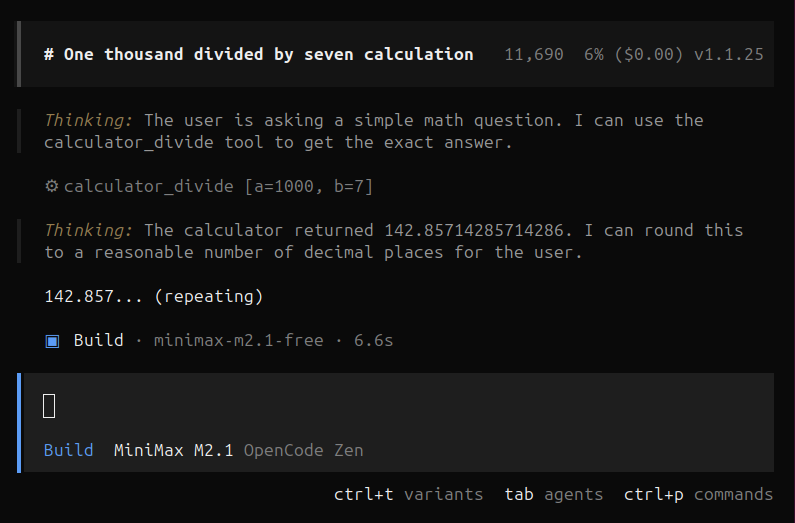
Agent using MCP
Conclusion
You've now successfully used OpenCode to create an MCP server and connected that server back to OpenCode, creating a complete cycle where the AI agent can leverage tools it generated itself. This calculator example demonstrates the fundamental workflow, but the real power of MCP is in building specialized tools for your specific needs from database queries, API integrations, file system operations, or domain-specific calculations and more!
From here, you can expand your calculator server with more operations, create entirely new MCP servers for different purposes, or explore the FastMCP documentation for advanced features like resources and prompts. The combination of AI-assisted development and extensible tool systems like MCP opens up powerful possibilities for building custom development workflows. Every tool you create makes your AI agent more capable, and every capability you add can help you build even more sophisticated tools.
For more OpenCode tutorials and self-hosted development tools, check out our other guides on the SourceBox blog.
Stop renting your digital existence.
Buy a board, spin up a container, take your data back.